How To Transcibe A File Using TranscribeAudio

We have worked hard to make TranscribeAudio really simple to use. You can follow this short guide to transcribe your audio files.
Navigate To Files
Navigate to your dashboard, and click on Files - this will take you to the Files view.
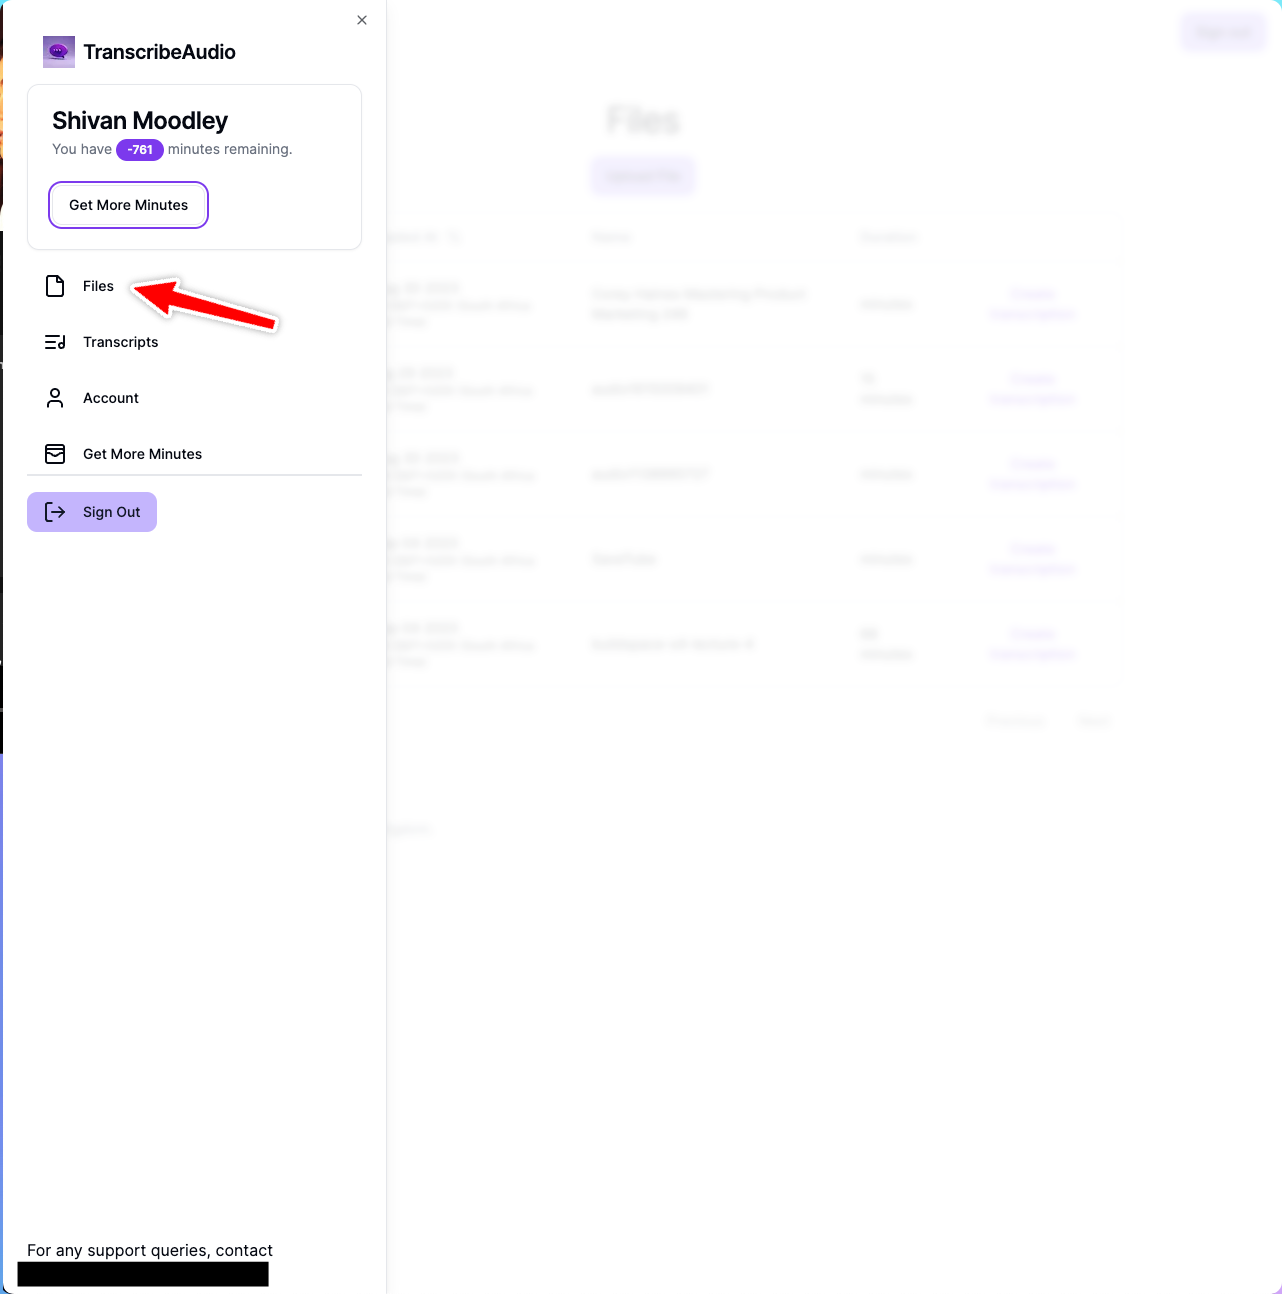
From here, you can upload files.
Upload A File
Click on Upload File, which will take you to the upload menu.


From here, select a file from your computer to upload. Our supported file formats are:
Support Audio File Types
- .3ga
- .8svx
- .aac
- .ac3
- .aif
- .aiff
- .alac
- .amr
- .ape
- .au
- .dss
- .flac
- .flv
- .m4a
- .m4b
- .m4p
- .m4r
- .mp3
- .mpga
- .ogg, .oga, .mogg
- .opus
- .qcp
- .tta
- .voc
- .wav
- .wma
- .wv
Supported Video File Types
- .webm
- .mts, .m2ts, .ts
- .mov
- .mp2
- .mp4, .m4p, .m4v
- .mxf
Wait For Upload Verification
We try to verify your files integrity after you've uploaded it.
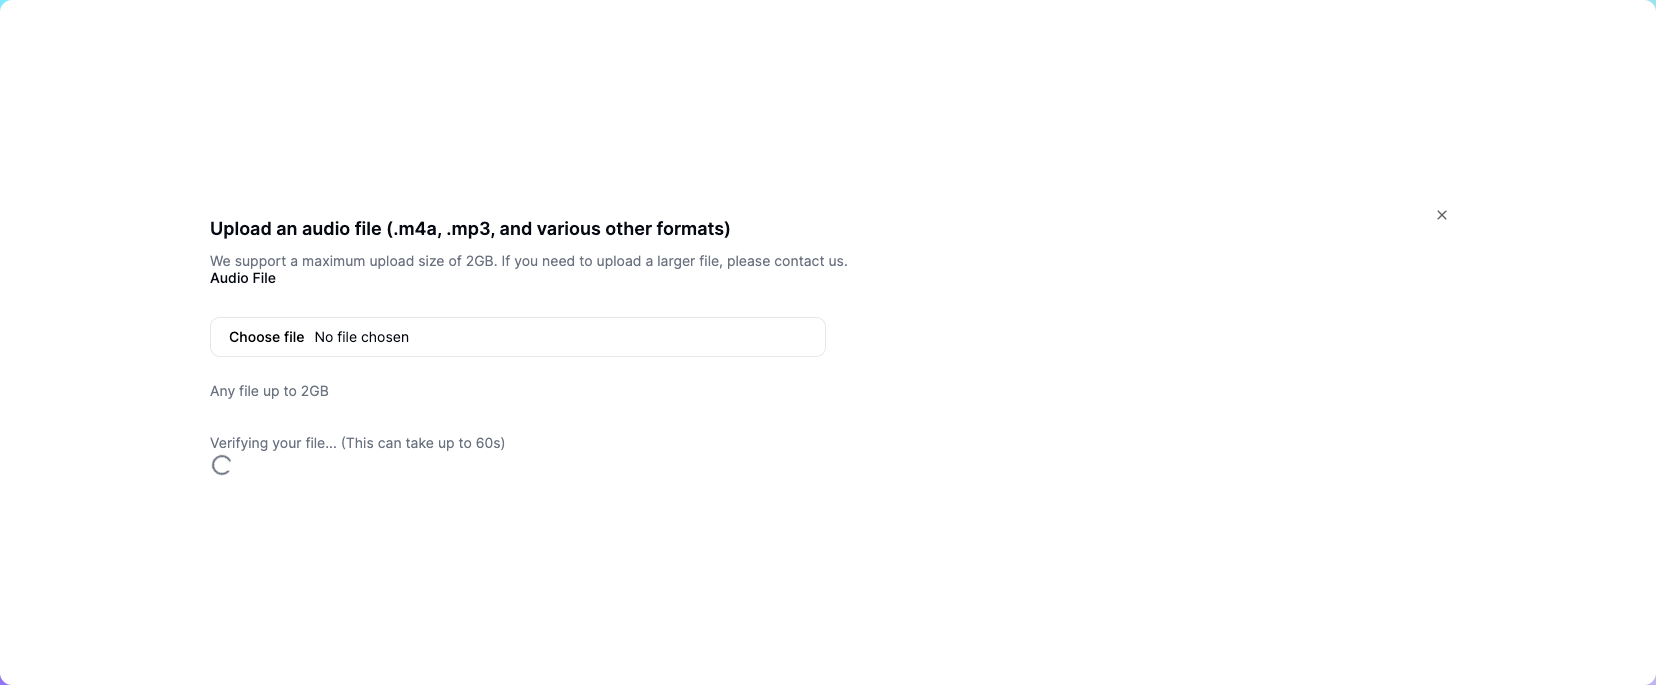
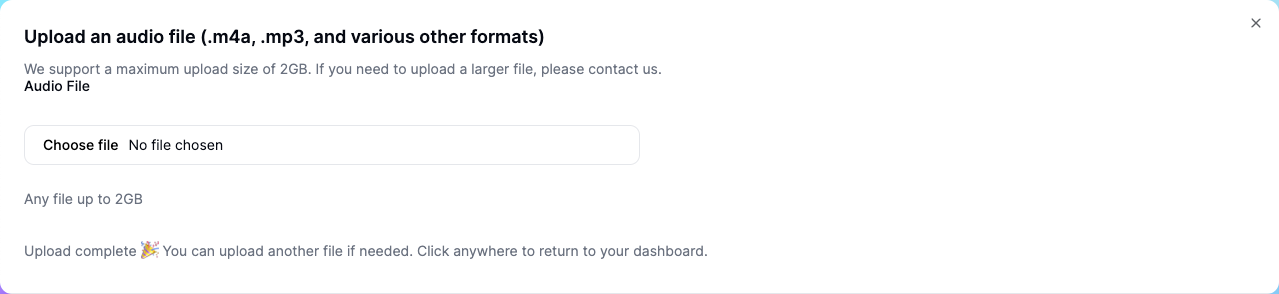
If we're unable to verify your file, we'll keep trying over time.
If your file is unable to be verified, and you're sure nothing is wrong with it. You can still use it to create a transcript. We won't remove any minutes from your account if we're unable to transcribe the file.
Create A Transcript
Once your file has finished uploading and verifying, click "Create Transcription" from the Files dashboard.
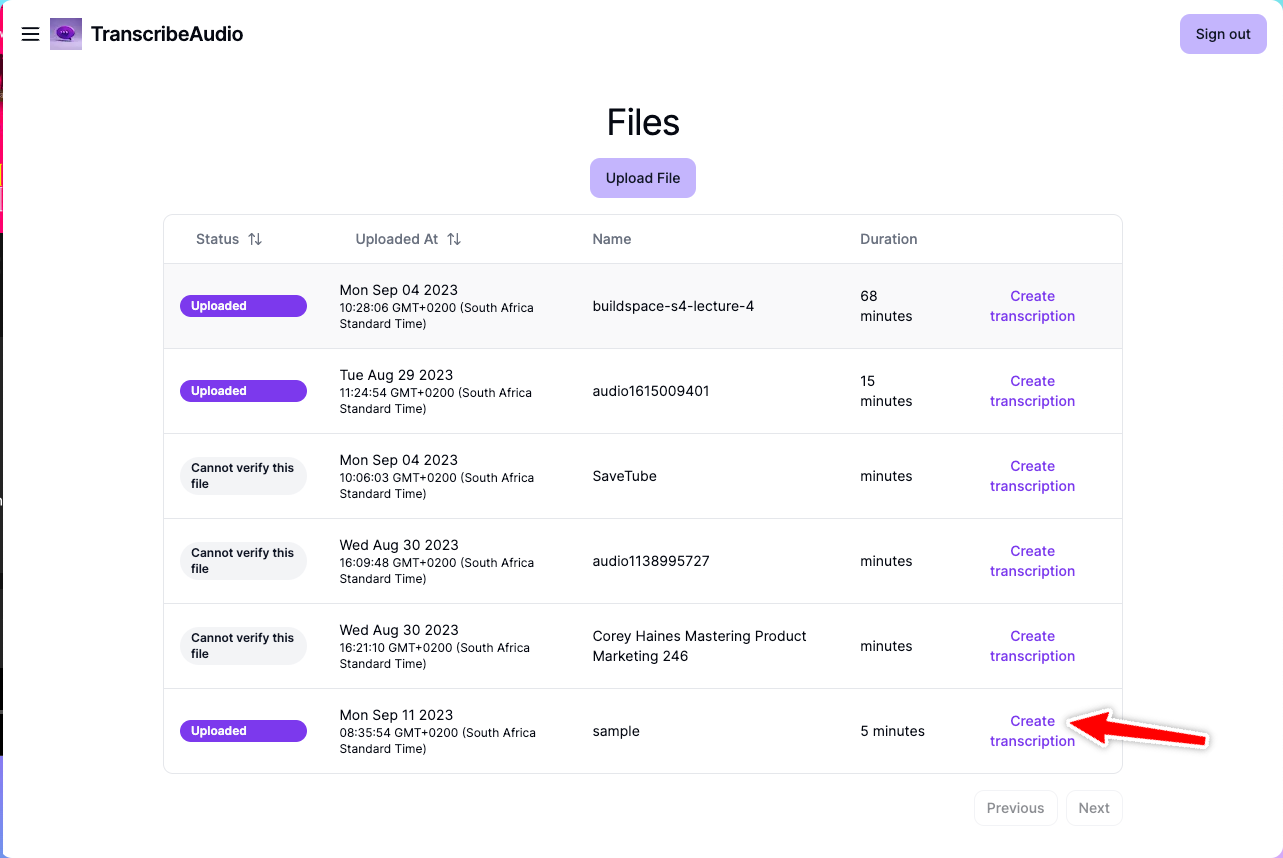
This will take you to the Create Transcript page, where you can give your transcript a name, and optionally, add some context about the contents.

When you're ready, click Submit, and we will start transcribing your file
Wait For Our Email
Once you've started a transcription, your transcript will be "Processing", and you'll see this in the Transcripts dashboard.

Once the transcript is ready, we'll send you a link via email, where you can view your transcript. This should take approximately 3 minutes.
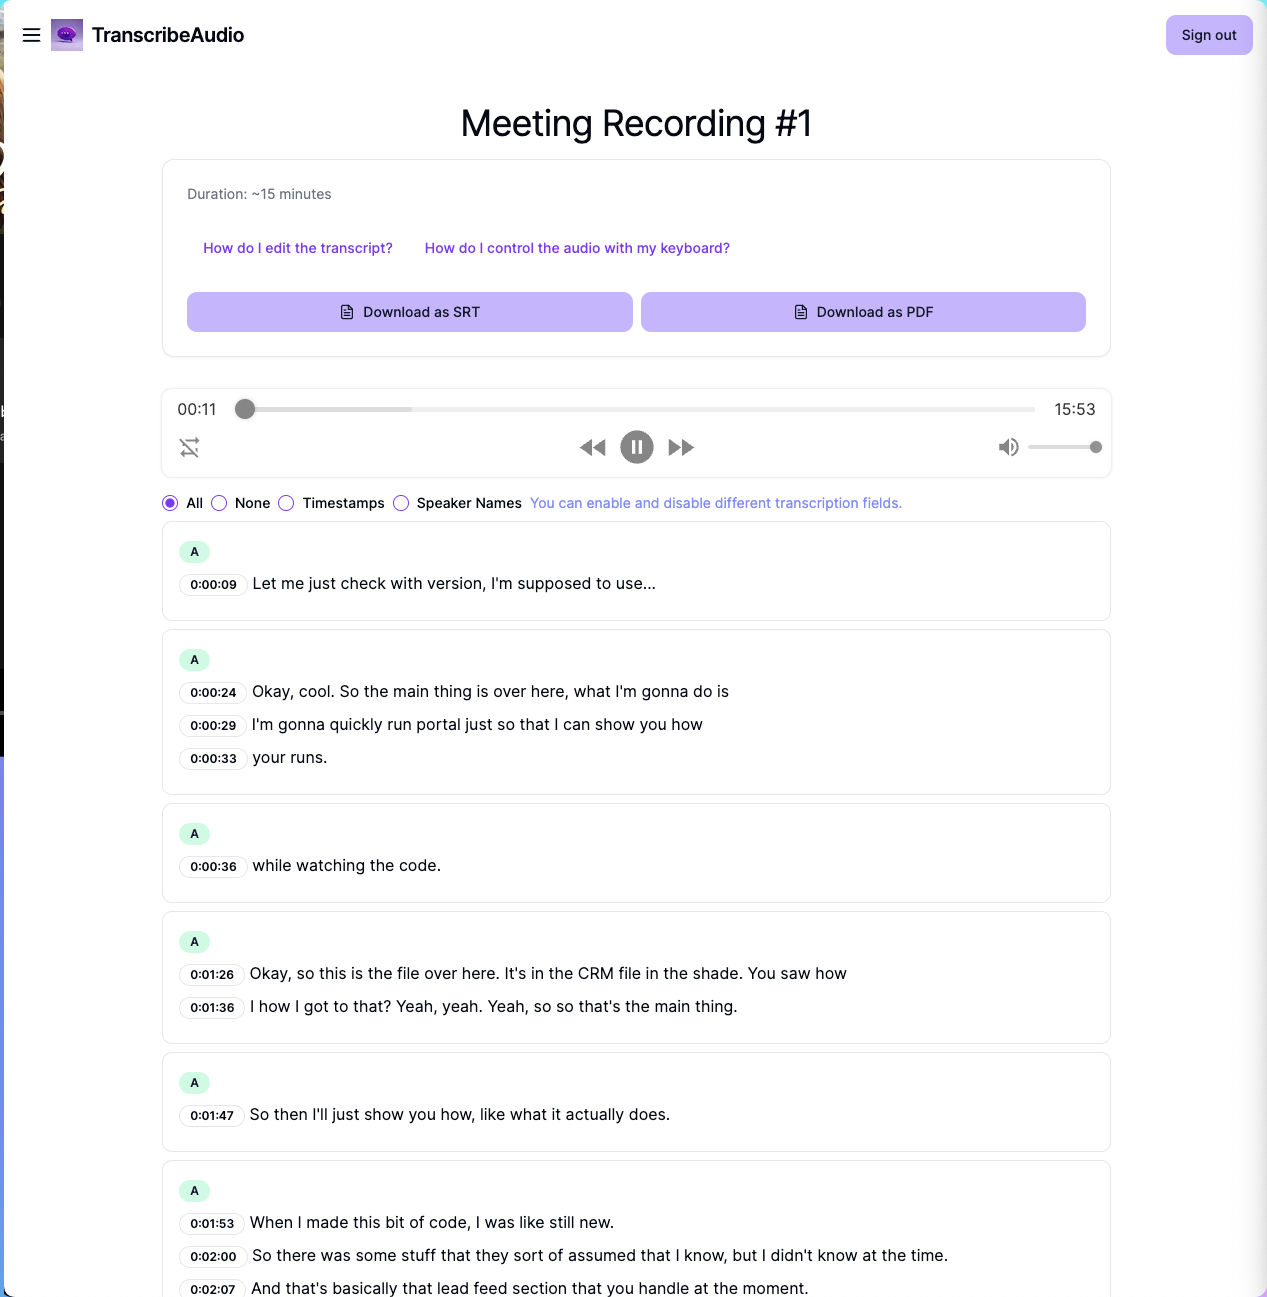
Read, Edit, Download
You can now use the editor to read, edit and download your transcript.
If you have any questions, or run into any issues, please email support@transcribeaudio.io - i'll reply as soon as possible.
All the best with your transcription!
